ARISSat-1 U/V transponder is working!

According to ARISSAT-1.ORG early this afternoon:  “The transponder is working! Drew, KO4MA was successful in easily working through the transponder with a 1 W uplink”

That is a great relief.

Maybe the kapton tape fell off and the antenna was still there — who knows.  At least it is working.

Posted in From the OM, Satellite | Leave a comment

ARISSat-1

During the July 31 test onboard the International Space Station, I was able to copy several telemetry frames as well as the voice announcement from a middle school in Texas (including the “secret” word).

On August 3, I anxiously viewed the live NAST-TV broadcast of EVA29, during which two Russian cosmonauts were to launch ARISSat-1 as the first task of the day.  Watching them as the exited the hatch was frightening — not because of the fear of them falling off, but because they were smashing ARISSat-1 into various parts of the ISS.  Listening to the audio feed, it became apparent that these two cosmonauts were bickering constantly and appeared to be in a pretty foul mood.  Things went from bad to worse when mission control announced that the UHF antenna was not installed, had broken off, or was rolled up inside the protective cap.  After some more arguing it was decided to stow the satellite until mission control could make a decision as to what to do.

The level of bickering really went off-scale at this point, with one of the cosmonauts saying something like “We should just toss the thing into space because it isn’t going to survive another EVA”.  When mission control asked for the satellite to be strapped in place, the cosmonaut refused and said he was just going to allow it to smash around the air-dock on its tether.

At this point it appeared that the mission was going to scrub, so I turned off NASA-TV and shook my head at the apparent lack of emotional control on the part of the cosmonauts.  Maybe they are trained differently, or maybe it is a cultural thing, but this was a different from anything I had ever heard coming from a NASA mission.

Much later that evening, I heard that ARISSat-1 had been “launched” at 1843 UTC (despite the antenna issue).  I’ve asked for formal confirmation from AMSAT and ARISSAT, but so far nobody has confirmed the status of the UHF antenna.  My suspicion is that it was placed in space “as is” with a broken/missing UHF antenna.

During two early morning passes today, I was able to copy eight frames of CW telemetry for passes around 10:49 UTC (MET 967 to 973) and 12:25 UTC (MET 1063-1066).  I was able to hear the BPSK signal, but there were no signals to be copied from the transponder — making me very concerned about the status of the UHF uplink antenna.

My first post-launch frame was copied starting at 10:48:54 UTC:  HI THIS IS ARISSAT1 RS01S KB3LKI PHI MET 967M IHU +27C CP +18C BAT 33.76V  + 411MA RF 312MA

This was the last frame I copied this morning starting at 12:27:56 UTC: HI THIS IS ARISSAT1 RS01S JA2PKI PHI MET 1066M IHU +29C CP +17C BAT 34.32V +502MA RF 507MA

The frame consists of the satellite identification that ends in RS01S, followed by a callsign of one of the people involved with the program.  PHI means the power is HI.  MET is the Mission Elapsed Time since launch in minutes.  This is followed by two temperatures (Internal Housekeeping Unit and Control Panel).  The battery voltage is next, followed by current (+ means charging).  You can also tell that the battery is charging by the increasing voltage between the two frames (99 minutes apart).

Posted in From the OM, Satellite | Leave a comment

Still fighting the good SDR fight

In May I acquired a FlexRadio Flex-1500 Software Defined Radio.  While the target market for that device might be the EME/VHF/UHF folks, it caught my attention for two reasons.  First, I have an ongoing interest in DSP and Software Defined Radios.  FlexRadio seems to be one of the leaders in that area.  Second, as a QRP person, the 5 watt Flex-1500 and small size was appealing as well.

Depending on your point of view an advantage (or disadvantage) of an SDR is that a PC becomes your user interface.  This is an advantage when you think in terms of the flexibility of such an interface — you can adapt it however you want.  In real life I would have to think that the human interface part of a traditional ham radio transceiver is at least half the actual cost of the hardware (all those knobs, controls, displays, etc.), and knowing professionally how much development time goes into user interface design, I would think that more than 50% of the total development cost is expended on the user interface.  So you can see the appeal of SDR.  Design a front end once and you can use it for many different radios/models — no more hard tooling to make pretty metal/plastic parts for the user to grab onto.  No more wiring harnesses to hook up all those displays and knobs.  In theory decoders for digital modes like PSK31 or JT65 could be built into the SDR user interface, just like the CW/SSB/AM/FM decoders.  You can hear the mantra “It’s only software!”

On the other hand the chief disadvantage of the SDR is the PC itself.  First off, unless you are talking very low performance PCs, PCs aren’t cheap.  But more important, good-old Windows is NOT a real-time operating system.  It is absolutely horrible at handling high-speed I/O streams because so much of the Windows operating system has a chance to delay that stream on an irregular basis.  Even high-end PCs with multiple core CPUs can still suffer problems due to the USB or FireWire interface involved.

The actual implementation of a software defined radio requires an enormous amount of I/O — mostly devoted to the continuous stream of digitized signal data.  In the case of the Flex-1500, the bottom end of the FlexRadio family, that is a 48KHz wide I/Q data stream.

With that as background, I am now on my THIRD attempt at getting the Flex-1500 to work.  My first half-hearted attempt to use a netbook failed as I expected it would.

My next attempt was to use a Macbook with a pretty high-end CPU and lots of RAM running Win XP under BootCamp.  I had been told that many Macbook users were happily using the Flex-1500.  But my experiences were not so joyful.

To begin with, once I installed the PowerSDR software on the Macbook, it made changes behind the scenes to the audio configuration.  The end result of this is that the built-in microphone was somehow patched directly to the built-in speakers of the laptop.  Such a connection is bad/wrong (badong) and creates not so wonderful audio feedback.  That unintended change to the WinXP operating system couldn’t be undone despite many hours of phone consultation with FlexRadio.  The only way to overcome the issue was to turn the laptop speakers off, a trade-off I could live with.

But other issues I couldn’t live with remained.  To begin with it was very difficult to get the Macbook and the Flex-1500 to “synchronize”.  That meant that many times when I would run PowerSDR and press the “Start” button, the radio wouldn’t work.  The fix was to exit the program, power cycle the Flex-1500, and restart the program.  Sometimes I might have to do that many times (six or more).  Sometimes I would have to reset the Macbook.  That meant that I couldn’t depend on the radio to start quickly and at times it might take me 10 minutes or longer just to get it working.  Flex support said that it was probably due to poor handling of the built-in USB port on that Macbook and said I should try on a different PC.

Once the Flex-1500 was up and running on the Macbook, the receive part worked well.  The Noise Reduction and filters were quite impressive.  That was the first time I had used a synchronous AM decoder, and it made listening to shortwave broadcasts very impressive.  I was starting to admire that little box.

All that changed, however, when I eventually got around to trying to actually transmit with the Flex-1500.  Being a 5 watt radio, I figured the best thing to do was start with CW.  What a disaster.  First off, there was a very long delay between when the key would be down and when the sidetone would come on.  That meant that sending code by hand using a straight key or keyer was impossible.  There is a feature in PowerSDR to allow the use of a keyboard to send code, which worked.

The final nail in the coffin for the Macbook attempt came about when I monitored my on-air signal on another receiver.  Whenever the key was up, there was a weaker carrier that could be heard droning in the background.  I hadn’t heard anything like that since the 70’s and some old tube SSB gear which failed to adequately suppress the carrier.  I was flabbergasted to hear that coming from a CW transmission.

Several emails and phone calls later, FlexRadio said that they would stand behind the radio 100%, but they really wanted me to try PowerSDR on a different higher-end PC.  I informed them that I wouldn’t have a lot of time to do that for several weeks.  I just got around to that yesterday.

I configured a high-end quad core 2.6 GHz CPU machine with 8GB of RAM, a very high-end video card, and a virgin install of Windows 7 SP1 64-bit software.  I then installed the latest version of PowerSDR.  In short this was supposed to be an ideal machine for a software designed radio.  It had nothing on the USB bus other than the mouse and keyboard, and no other utilities or software installed other than PowerSDR.

The great news was that the startup issue I had with the Macbook was gone using this new configuration.  In several dozen startup situations, it only failed to synchronize once, and just restarting the program dealt with that.  I was very happy!

But wait, what was that going on in the headphones of the Flex-1500?  Lots of pops and clicks that I didn’t hear when using the Macbook.  Fiddling around with some of the setup parameters lead me to believe that I was suffering USB data transfer issues with this very high-end PC.  I was able to improve the situation, but it would still happen randomly.  When it did, it was both painful to listen to and very disruptive to receiving code as it might wipe out a character.  I am waiting to hear back from Flex support on that issue.

The other good news was that on transmit the delay between key down and the sidetone was now gone.  It was almost possible to send code by hand — however those loud pops and clicks would mess me up every time.  However I noticed something else about CW.  Over a period of about 4 seconds, the space between dots or dashes would change quite dramatically.  It sounded like a bug slowing down or speeding up — a drunken fist, if you will.

Finally, the dreaded droning carrier was still there, just as loud as when I was using the Macbook.  Nevertheless, I soldiered on and decided to try to make a CW contact.  I found someone calling CQ on 15 meters and they came back to me right away.  But the OP commented that there was something wrong with my signal!  Thus ended my experiment.  No more on-air tests until FlexRadio resolves this.

At this point I have a Flex-1500 that has been tried on three different classes of PCs.  A netbook (OK, I never expected that to work), a Macbook that fully meets/exceeds all published minimum requirements, and a high-end PC.  None of these work.  I’ve been told that the high-end PC may have issues handling the USB data, despite the rather modest USB 1.0 requirement of the Flex-1500.

As I said, I’m waiting for a response from FlexRadio.  The good news is that they are a wonderfully helpful bunch of guys, and they have claimed that they will stand behind the radio 100%.  They have certainly spend many hours on the phone with me trying to help.  The bad news is I am running out of PCs and starting to lose faith in what a software designed radio can do.  We shall see what the future holds.  I’d love to get it working.

Posted in From the OM, Gear | 1 Comment

96,000 Miles per Watt

My friend, WB4KDI, from Birmingham, AL, and I were running some QRP and QRPp experiments with his new Elecraft K3 A week ago on the 30 meter band.  David and I were running JT65, and he dialed his power down to 100 mW, the lowest setting of his K3.  I had no trouble copying him at -18 to -16 dB.  On my end, the path didn’t seem to be working as well in the reverse direction but he was able to copy my 500 mW signal with no problem.

I was thinking how cool it was that David had managed to get about 12,000 miles per watt in our contact.  I was going back through the signal reports to document things when I noticed that Laurie, VK3AMA in Melbourne Australia, was also hearing him at -22 dB.  Unfortunately that was a RB report which doesn’t count for real, but WB4KDI’s signal traveled 96,000 miles per watt that night.

Every day I am more impressed with JT65.

Posted in From the OM, JT65A-HF | Leave a comment

Field Day 2011

Remembering the fun I had 40 years ago working field day for K4BFT in Huntsville Alabama, and K2AE in Schenectady New York, I figured it might be fun to try my hand at FD again.  I had hoped to contact a local club, but not unexpectedly, family life got in the way.

So I decided to run class 1E (Home Station on 100% Emergency Power) with a twist.  First, I ran a QRP rig (FT-817ND) into a BuddiPole antenna set up as a full-size (no coils) vertical on 20 meters.  The radio was run off of a battery pack that was charged by a 30 watt folding solar panel.

WB4SON 1E RI Field Day Station

I only had a total of about 3 hours to devote to FD during the entire weekend, but during that time I managed to slug out 19 QSOs on low power.  I sure could hear a lot more than I could work, but then again I didn’t have to worry about my receiver going nuts with a dozen other transmitting stations running 100 watts with their antennas a hundred feet away from mine.  I’d guess that about 1/4 of my attempts were successful.  I generally stuck to the louder sounding signals on the band.

Field Day participation seems to be declining, and there aren’t many RI stations that participate (last year there were a total of 12 in all classes).  So despite my tiny effort from the tiny state, I might still come out on top of the 1E RI class.  However, the entire thing put a smile on my face — I had fun.  I also learned that it was pretty fast to setup my station (20 minutes; 15 for the antenna and 5 for everything else).  So maybe next year I might setup a 1B station at a nearby pond, or join in with one of the area clubs.

Have fun every day!

Posted in Alternative Power, From the OM, Gear, QRP | Leave a comment

Fifth WAS completed on June 24 using JT65

Well, this Friday at about 2PM, the big event happened.  One of the FIVE different MD stations that I’ve made a JT65 contact with confirmed the QSO on LotW.  This completed my quest for WAS which was officially completed after 279 JT65 QSOs over a period of 4 months and 2 days.  Unofficially, it was finished in May, but finding a MD station that would confirm took another month.

In my ham career, I actually completed WAS as a Novice Class, WN4SON, 40 years ago, then as an Advanced Class using mixed voice and CW modes a year later.  When the 30 meter band was made available to US hams I completed WAS in a period of a couple of months, but found out that the ARRL wouldn’t recognize any 30 meter contacts (they still don’t — not until after you have completed 5BWAS).

In 1982 I completed it a 4th time, using 45 baud RTTY.  (All of those contacts were made using a Model 15 teletype that was made in the late 1930’s with a homemade FSK decoder and current loop interface.  It was a wonderful mechanical beast that worked as long as you cleaned it and oiled it every once and awhile.  It had that old-time newsroom sound to it as it clunked away.  While I put it in the scrap yard some years ago, I saved all the keycaps.)

Model 15 Teletype

Why bother with WAS a 5th time?  Well, it is the first time that I’ve done it using low power (all QSOs were 5 watts or less), and the first time for JT65, which has been a wonderful mode for me (perfect for bad antennas and low power — thanks again Joe Large and Joe Taylor).  Plus those other four times required that the QSL cards be sent to the ARRL for checking — something that was time consuming and too risky for my taste.  Now, using the all electronic LotW, it is possible to get secure confirmations quickly.  Of my 279 QSOs on JT65, 185 of them were confirmed (so far) on LotW.  Clearly not everyone participates.  But many thanks to those that do, especially W3BUI — MD QSO #5, and MD LotW #1.

Posted in Digital Mode, From the OM, History, JT65A-HF | 2 Comments

You light up my life…(almost)

One of the conveniences of the WB4SON Shack (called the “Wombat Room” by family members), is a 40 Amp 12 VDC power bus, normally fed by an Astron linear power supply.  It is also fed by a 110 Amp-Hour deep cycle battery which takes over when grid power is down.  The battery is kept charged by a 40 watt solar panel (with charge controller)  mounted on the roof with a good southerly exposure.

So it’s a good thing to know that WB4SON can stay on the air during an ice-storm, or rare hurricane, but up until recently lighting the Wombat Room was performed by flashlights.  That has changed with the addition of some LED lighting designed for 12 VDC systems.

My first attempt was to use some under-cabinet LED strip lights that were a tad shorter than 4 feet.  I simply mounted these next to each T12 40 Watt florescent lamp in the room.  When power died I turned on the DC strip lights.  While they provided some nice atmosphere, the lighting left something to be desired.

I’ve improved things by adding two suspended LED lamps that are closer to the work surface and provide substantially more light.  These are made by a company called Goal ZeroAmazon sells these for about $35 each including shipping.

The lamps have 9 foot long DC power cords.  A custom carabiner allows you to hang the light at any level.  Multiple lamps (up to 12) can be chained together.  The lamp uses a odd 0.256″ DC barrel connector, but it does have a 12 VDC cigarette adapter that can be attached to the cord.   Each lamp has an on/off switch.  The vendor claims they can be rained on, but are not waterproof.

While I like the product concept very much (the carabiner, daisy chaining, power/light level), the units I have are suffering from a major technical issue;  they aren’t meeting the manufacturer’s claimed specs of 0.26 amp current draw each (3.0 watts).  My units are exactly half that at 0.13 amps (1.6 watts).   Also, like many of the LED/CFL producers Goal Zero is playing fast and loose with the light level output, claiming one of their 3.0 watt lamps produces the same light output as a 40 watt incandescent lamp.  The standard for a 40 watt lamp is 500 lumens — which is almost twice the lumen output of the 270 lumen  Goal Zero lamp — in fact this is a lower lumen output than a 30 watt incandescent lamp.

It makes me wish I had an integrating photometer so I could see what the true output of this lamp is.  Given the current draw is half spec, and the output is overstated by a factor of 2 as well, want to bet it is more like the output of a 15 watt lamp, instead? (A high-efficiency 1.5 watt LED produces about 120 lumens — the equivalent of a 15 watt incandescent lamp.  Of curse it is still 1/10th the power consumption for the same amount of light — but the point is the actual output of the Light-a-Life is more like a 15 watt lamp, and nowhere close to a 40 watt lamp.

I’ve contacted the company about this issue and will edit the post once I find out what is going on.  I have purchased a second lamp from a different source and found that it too consumes only 0.13 amps, or 1.5 watts — half the rating.

3 watt/240 lumen 12 VDC lamp

Light-A-Life 3 Watt LED Lamp

Posted in Alternative Power, From the OM, Gear | 2 Comments

Let’s do the power pole polka…

I can remember looking at Anderson Power Pole connectors when they first came out years ago and thinking they will never sell because there were other products that served a similar purpose and they were ridiculously overpriced.  Yet now I find myself with a ammo box full of various contacts, Power Pole covers, crimp tools, and adapters.

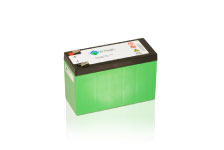
These little guys seem to be showing up in more places — many of them installed by your’s truly, and others on commercial products.  I have them installed on my folding solar panels, SLA Batteries, DC lights, fans, and rigs.  Since they are largely interchangeable it makes it simple to plug various equipment together without requiring tools.  Going from main power to battery or solar is a snick away.

Most of the ham distributors offer them in various contact ratings (actually wire gauge as the contact itself is the same) and quantities.   They run from a bit under to a bit over a dollar for a set (one red shell, one black shell, two contacts and a roll-pin that locks the plastic parts together).

I’m always swapping radios or power equipment around so they make an ideal solution for me.

Power Pole Connector

Posted in From the OM, Gear | Leave a comment

Adding those useful little html thingies…

So here I am in the land of WordPress blogging and there are some really neat ham-radio related HTML links.  I had no idea how to add one to my site.  I tried embedding it in a post, but that didn’t work (the html source code appeared on the screen).

It turns out an easy way to do this is to add the “Text Widget” to one of available spots.  Type in a name for the wizard in the Name box and add the html code into the text box.

Easy!

Posted in From the OM | Leave a comment

Kickstarting Apple Boot Camp for Win7 64-bit

One thing leads to another…
No good deed goes unpunished…

I’ve been using a Win XP-based Asus Netbook with my Yaesu FT817 and SignaLink USB to run Ham Radio Deluxe and Joe Large’s JT65-HF program.  Despite the diminutive screen and single-core Atom CPU, the Netbook seemed up to the task.  And as I was building an emergency ham radio ‘bug-out-bag’, a small laptop that runs off of 13.8 VDC seemed ideal.  16AH worth of SLA Batteries and a folding 20 watt solar panel went into the bag along with the radio gear and Netbook.

When I decided to experiment with JT65-HF and my IC-9100, things got complicated.  It turns out the Icom USB drivers under WinXP will not allow you to adjust the Radio to PC audio level (nor does the IC-9100 itself — a major shortcoming).  However Win7 always includes basic slider controls for the inbound sources.

Since Microsoft was running a special Win7 Home Premium Upgrade promotion (3 PC updates for the price of one – I figured I would use one of the updates on the Netbook.  This turned into a weekend-long horror show getting the Win7 update installed.  Most of the difficulty centered around finding and installing all the required updates for the Asus netbook — including a BIOS update (that was supposed to be installed BEFORE Win7 was installed, but you don’t know that until you get an error message).

Eventually after at least 20 hours of trying, I had an Asus Netbook that would boot into Win7 64-bit.  However, the internal netbook speakers would not work at all — my netbook would only produce audio through the headphone jack.  Otherwise it was deaf and dumb – something that was anoying but I could live with.

As I installed more and more radio related software, it became apparent that the netbook was not up to the task (the small low-resolution screen was the problem).  I briefly considered buying another small netbook-like device with an 11-inch display, but figured it wasn’t worth the headache.  Then I remembered a retired MacBook late-2009 edition that had a Core 2 Duo CPU at 2.2 GHz, SSD, and 4 GB of RAM, and a pre-existing WinXP Boot Camp installation on it.

I figured copy 2 of my 3 copy Win7 update was going on the MacBook.  Everything I read seemed to indicate I was good to run Win7 64-bit, so I fired up Boot Camp Assistant, put my update disc into the MacBook drive and told it to install Windows.

I was greeted with a few seconds of disk spinning, thne a prompt appeared on the screen that asked me to pick a CD-ROM boot option; 1 or 2 (with no other text shown) and the machine locked up.  Google was my friend, yet again, and I discovered the reason for the hang.  Microsoft uses a non-standard directory structure on their DVDs that doesn’t play well with Apple.  They know this and have documented a way around it that involves using the update disk as a source to create an ISO file containing all the files from the update disk.  To use this requires a Win7 machine, which I happened to have, plus a program called oscdimg.exe, available for download from Microsoft.

With a copy of that program, plus the original Microsoft DVD with the Win7 Update the following must be done:

  • Create 3 folders c:iso c:exe c:dvd
  • Download oscdimg.exe from Microsoft and put it in c:exe
  • Copy all the contents of the DVD to c:dvd (it is about 3.5 GB)
  • Start up a command prompt (Start -> Run -> cmd)
  • Type: cd c:exe
  • Type: oscdimg -n -m -bc:dvdbootetfsboot.com c:dvd c:isoWin764.iso

You can then use the ISO file in the c:iso directory along with your favorite DVD authoring software (like Nero), to burn the ISO to a DVD.

Using the new Win7 64-bit DVD with Boot Camp Assistant in the Mac mode will now work, and after about 30 minutes you will be rewarded with a working copy of Win7 on your MacBook Boot Camp partition.

Yet the story doesn’t end there.  When you try to install the Boot Camp drivers that come on the Snow Leopard installation disk, you will get a warning that the drivers won’t work with Win7 64-bit.  In my case, that is untrue, and it works fine with the MacBook circa late 2009.  To get them to run, however, requires another sleight of hand.

Put the disk back into the drive and dismiss the error message “Boot Camp x64 is unsupported on this computer model.”.  Open the DVD and move to the Boot CampDriversApple folder.  Find the “BootCamp64.msi” file and right-click on it.  Pick “Troubleshoot compatibility”, which will disable the Win7 Version check.  Finally press “Start the program…” to start the installation of the Apple drivers.

A few resets later you will be presented with a working Win7 64-bit boot camp partition.  Update the Boot Camp drivers to 3.2 (the Snow Leopard DVD comes with Boot Camp 3.1).

Posted in Computers, From the OM | Leave a comment