A dedicated 240V line better for the KPA500

When I purchased my KPA500 at the end of last year, I didn’t have a 240V outlet in the ham shack, so I was forced to run off of a 120V feed.  Unfortunately, the ham shack is about 75 feet away from the breaker box, so there was some pretty hefty IR drop on that circuit since the amplifier pulls about 10 amps.  As a consequence I would see the HV drop from 76 volts in standby to 55 volts at 500 watts output.

In general I didn’t use the KPA500 often, and I rarely use SSB.  But a HV reading below 60 volts was disconcerting because it can lead to increased IMD.

I finally got around to running a dedicated 20A 240V circuit to the shack this past weekend.  I’m happy to report that the minimum HV under full output is now 64 volts — an improvement of 9 volts due to reduced IR drop on the power feed.  As a side benefit, I noted that it requires about 2 watts less drive to produce 500 watts of output.

Posted in From the OM, Gear | Leave a comment

Diamond DXCC

The ARRL has a special DXCC award in celebration of the 75th (Diamond) anniversary of the DXCC program, which began in September of 1937 with a list of just over 200 eligible countries.  The purpose of the DDXCC award is to try and contact as many of those original countries as possible during 2012.

When the ARRL published some tools to keep track of your worked countries (tools can be found here), I decided it was time to go through my logbook, and I came up with 126 entries (so I thought).  Now trying to match modern country prefixes to old countries is tough.  For example a YO6T Yemeni contact might be logged in 3 different places, but it counts as Socotra Island.  Sure enough after submitting my 126 entries, I had attributed one to the wrong place and it was eliminated.  Fortunately that still left me with 125 countries, good enough for the basic award with the endorsement for 125 countries (the endorsement is black print on a silver sticker — it doesn’t look great in the scanned image below).

These certificates are not numbered, so there is no rush to obtain one.  In fact you could wait until the end of the year.  Contacts do not have to be confirmed at all, which is great given the poor confirmation rate of many DX stations (I’ve worked 179 countries and have confirmation from 129, for example).  It’s actually nice to have an award that is based strictly on the honor system.  More can be read about the DDXCC Award here:  http://www.arrl.org/diamond-dxcc

Diamond DXCC Award with 125 Endorsement

Posted in DX, From the OM | Leave a comment

Field Day Satellite Success

After operating Field Day last year by myself (Category 1E) and remembering back to the fun I had with my fellow club members during FD with K4BFT in Huntsville, AL and K2AE in Schenectady, NY, I sought out a club to operate with this year.  I wound up joining the Newport County Radio Club (a toll bridge and 25 miles away), and agreed to try for the 100 point bonus for making a satellite QSO.  I understand they had tried several times in the past but had never managed a contact.

With the recent loss of AO-51, and the general reputation of the FM birds being impossibly crowded anyway, I decided to concentrate my efforts on the two remaining analog birds, 16-year old FO-29, and 7-year old VO-52.  Of course there was always the 38-year old AO-7 as well.

I started about 2 weeks before making about two dozen contacts through FO-29, VO-52, AO-27 and SO-50 using my regular home antennas and preamps (M2 Eggbeaters with SSBE Preamps).  So I knew my offsets and was back in the satellite grove.  I setup my Arrow II Satellite Antenna and knew that it loaded well, but never had a chance to use it during an actual pass due to some nasty weather.  So they mystery was if the gain of the crossed-yagi would offset the loss of the preamps, and how much desenseing my Icom IC-9100 would experience — what would Field Day be without a little mystery?

My goal was to get the Satellite QSO as quickly as I could on Saturday.  We began operation at 1800UTC.  During that time there was a pass of AO-27, but all I heard was Packet, no FM voice.  AO-7 was my next attempt, and I easily heard my CW downlink, but the pass was marginal for the US, mostly favoring Europe.  During the end of the pass I heard only one station, a European calling CQ Field Day, but I never copied his full call before the satellite passed beneath the horizon.  Although I didn’t make any contacts, these initial attempts proved that the front-end of the IC-9100 was up to the task, and the beam gain more than made up for the lack of a preamp.

My last opportunity was a marginal FO-29 pass that would begin about 1855Z.  The advantage was it was covering most of the US.  The disadvantage was it would only reach about 20 degrees of altitude in a direction dominated by tall pine trees to my west.  Right on schedule, FO-29 came into view and the receiver was filled with S5 to S9 strings of dots everywhere.  There must have been dozens and dozens of stations all trying to find themselves.  Because I already knew my offsets, my transmitter and receiver were already slaved spot-on, and sure enough I immediately heard my downlink.  I called CQ and was rewarded with a reply on the first call, but the station sent my call about six times before sending his own, only to be lost in a a hail of QRM dots.  I changed to SSB and was part way through a QSO when a full carrier obliterated the downlink.

With only about 12 minutes for the full pass there was little time to mess around, and I figured it was time for a new strategy.  I changed back to CW to try search and pounce.  Luckily I ran across K4TLH, a 2A station in Northern Florida calling CQ FD.  At 1903UTC we completed our exchanges.  I happened to setup in the GOTA tent, so the QSO was observed by a few guests as well.  And just like that Newport County Radio Club, operating as W1LY, had their first Field Day satellite QSO (and I had mine too).

Satellite Antenna pointing NW

IC-9100 Satellite Station (PCSAT32 Doppler Correction)

What was my overall impression?  This was an interesting experiment, but impractical from an E-COM point of view.  I can understand why this was so difficult during prior attempts.  Bedlam on FO-29 made it hard to get through.  I was unbelievably impressed that AO-7 is still working 38 years after launch (it was empty, however).  But my biggest take-away was knowing your uplink/downlink offset prior to the contest was key to the almost impossible task of finding yourself in a sea of dots and being confident you are on frequency.

Posted in From the OM, Gear, Satellite | Leave a comment

A 12 Ounce QRP Antenna

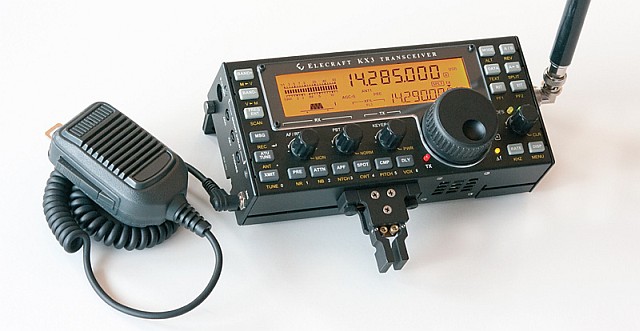
My KX3 fits in a small video camera bag, along with all the accessories (mike, paddle, PC cables, DC cord, spare batteries, solar charger, etc.), with room to spare.  I wanted to add a light-weight antenna to make a complete pack.

I located a small Center Insulator with a BNC connector, called the MK-67 from www.ElectronicsUSA.com.  By using BNC connectors, I’d have a direct match to my rig on one end and the antenna on another, and I could use light weight RG-174A/U coax for the feedline.  I purchased a 25 foot pre-made cable from www.CablesOnDemand.com.

A nice thing about the MK-67 Center Insulator is that the antenna legs attach via wing-nuts.  This naturally leads to making sets of dipole legs for the bands of interest.  So you only need to purchase a single center insulator, but you can easily change over to any band you desire.  In my case I made seven sets of dipole legs for all bands from 40 meters to 10 meters.

I used 22 AWG Silver Plated Teflon insulated wire that I obtained from eBay.  Why Teflon?  It resists kinking and the insulation is abrasion resistant. This makes it easier to deploy.  I completed my antenna kit by obtaining hanks of Nite Ize Tent Cord.  This cord is very strong yet thin and light weight, and it has a reflective weave that makes it stand out in the dark .  Three lengths were obtained:  one to hoist the center insulator up (although it can dangle in the middle if you don’t mind some sag), and one for each dipole leg.

The antenna legs were fabricated to be resonant toward the lower end of the ham band since I mostly work CW.  An extra 1.5 inches was added to the formula length to make a loop in the end to affix to the support cord.  So for 20 meters, I cut 16′ 6.5″.  Color-coded heat shrink tubing protects the solder joint where the loop was formed, and helps keep the different sets of legs together.  A closed ring-terminal was soldered to the other end of the wire.

Basically after cutting the wire to the correct length (adding 1.5 inches for a loop), one end was prepared by stripping 0.75″ of insulation from the end.  The insulation was then cut and partially stripped back about 0.25″, leaving about 0.50″ on uninsulated wire at the very end.  A color coded piece of heat shrink is then slipped over the wire and the 0.50″ of bare wire is wrapped tightly around the exposed 0.25″ section, forming a 1.0 inch loop at the end) that looks like this:

Loop at End of Dipole Leg

After soldering the loop, the heat shrink tubing is slipped over the joint to cover the bare wire and heated to shrink in place.  About 0.25″ of insulation is removed from the other end of the wire, and a ring-terminal is crimped in place.  The terminal is then soldered for extra strength, and looks like this:

Ring-Terminal to Connect to Center Insulator

The entire 20 meter antenna package with coax, center insulator, and support cords weighs about 12 ounces and fits easily into my KX3 “GO Bag”.

Entire QRP Dipole with Pair of Legs Attached and RG-174 Coax Feed

Posted in From the OM, Gear, QRP | 2 Comments

A RI DMV Update concerning “Amateur Radio Operator Plates”

I received another phone call from the RI DMV.  This time it was from one of the employees in the finance office.  He had contacted the department lawyer, and informed me that there are really only three fees associated with getting a ham call plate in RI.

The first is the $1.50 “DMV Surcharge” fee, and the second is a $5.00 “Enhanced Access” fee (Both of these fees are charged for every DMV transaction now).  So the plate cost is $6.50 (a one time fee).  There is no actual fee for the plate itself (neither a “first time” nor “remake” fee).  The third fee is a change of registration to change from my original plate to the new ham plate.  This final fee is paid when I pick up the new plates.

Even better, I was told that I could mail in the application for the plates, using the standard Vanity Plate form (the only form available online), and simply write “Amateur Radio Operator Plates.  $6.50 fee per finance.” in the upper-left margin, then fill in the call in the vanity letter area.  I would then receive a post card in 4 to 6 weeks when the plates were available.

Here’s the form:  RI DMV Vanity Form

Posted in From the OM | 3 Comments

The IC-9100 gets added to the D-Star list

With the VHF/UHF contest this weekend, I figured I would dust off the IC-9100 and see if I could scare up a few SSB QSOs.   Within a couple of minutes I had a two on 2 meters and one on 70 cm.  So the equipment was working fine.  Good to know since I need to use it for satellite work during Field Day.

My next task was to get the 9100 onto D-Star using the local machine.  Having been through the process with the IC-80AD, things were much easier, but of course the IC-9100 is organized differently and uses slightly different names.  Still MY, UR, R1 and R2 were quickly setup, and I was able to keyup the W1AAD repeater in short order.  But after several calls for an audio check, there was no response.

DSPLUS to the rescue — I changed my UR call to “——-E” (seven blanks with an “E” in the 8th position).  Sure enough my Echo Test was successful and I heard clear audio coming back.  My IC-9100 is now on D-Star.

This D-Star stuff is pretty cool!

Posted in D-Star, From the OM, Gear | Leave a comment

Using D-PRS with the Icom IC-80AD in DVG Mode

When running in the Digital Voice (DV) mode, the IC-80AD is capable of sending “low-speed” data along with the voice stream.  One of the possible uses for that data is position reporting.  That position data can be shared over the internet via a D-Star Gateway, making it possible to use a mapping service such as www.aprs.fi or www.openaprs.net to map your radio position.  Position data might be useful for reporting your progress up a summit for a SOTA (Summits on the Air) activation, for example.

The HM-189GPS Speaker/Mic includes a GPS receiver.  If you properly configure the IC-80AD, you can report your position whenever you transmit audio or automatically  (generally frowned upon).   Your data is picked up by the Gateway receiver and converted into APRS (Automatic Packet Reporting System) strings, and shipped out onto the internet.

It isn’t very difficult to setup the radio in theory, but Icom’s less than stellar manual makes the task a challenge by failing to explain how things work in general, or explaining in one place what needs to be done.  The rig’s keypad interface doesn’t help because all the required settings are spread into unrelated menu branches.  It also doesn’t help that different Icom models use different names for the same things, and organize things in different ways.  Despite the fact that Icom has been pushing D-Star radios for more than a decade they still haven’t figured out how to make an easy to use radio or write a decent manual.

Step One is to get your radio working in the DV mode through your local D-Star repeater (see my prior post for that).

Step Two is to decide what your objectives are.  Are you looking to share your position data with internet mapping services, or are you trying to report your position so that your fellow hams can see your lat/lon/altitude on their rig’s display.  The reason this is important is there are two different modes of configuring the 80AD.  The “newest” is called “DVA” and is a bit easier to setup.  So if you mostly want to use the internet mapping services, this might be a good choice.  But it has two limitations:  it doesn’t report your altitude, and that data can’t be shown on most rig’s display.  The original mode, called “DVG” overcomes those two limitations, but is harder to setup.

Let’s assume you want to configure your 80AD to use the DVG “GPS Mode”.  The required settings are located in several different menu branches, but the general items that need to be configured are as follows:

  1. Set GPS-TX  to DVG (Puts the 80AD into DVG mode)
  2. Set RMC to ON (Send “Recommended Minimum” GPS Data (position/track — but no altitude)
  3. Set GGA to ON (Send 3D data including altitude — but no track info)
  4. Set GLL to OFF (Don’t send position in Loran format)
  5. Set GSA to OFF (Don’t send satellite data)
  6. Set VTG to OFF (Don’t send velocity and track data)
  7. Set GSV to OFF (Don’t send satellites in view)
  8. Set GPS.ATX to OFF
  9. Set MESSAG/TX GPS to the correct GPS Message

The parameters RMC/GGA/GLL/GSA/VTG/GSV are all abbreviations for NEMA GPS Strings (like “$GPSRMC”) that are output by the HM-189GPS Speaker/Mic.  Those that are turned ON will be sent by the radio.  The more strings turned ON, the more time required to send them.  I’ve read you should never have more than four turned ON.  RMC and GGA are the two most common.


Posted in D-Star, From the OM | Leave a comment

D-Star and the Icom IC-80AD

“I’d send it back if I were you” — was probably the best advice I received this past weekend, after voicing my frustration over setting up the Icom IC-80AD handheld to access my local D-Star repeaters.  (The manual is poorly written, the rig’s keyboard interface is poorly designed and organized, and the software, although highly visual, simply doesn’t work right and has NO documentation.)

D-Star Digital Voice mode is different in many ways from the old FM days.  First of all you either hear the other station or you don’t (you might get a brief digital burp if things aren’t working well).  But some of the exchange information is dealt with digitally.  There is some basic stuff that needs to be setup — pretty logical and simple.  The critical things are:

  • MYCALL — this is set to your amateur call.  In my case “WB4SON”
  • RPT1 — this is the call sign of the repeater being used plus a channel indicator (the channel indicator MUST be in the 8th position, and is “C” for 2 meters: so in my case it is “W1AAD  C”  with 2 spaces between the “D” and “C”)
  • RPT2 — this the the gateway to the internet, generally the same call as RPT1 with a “G” (so in my case it is “W1AAD  G” with 2 spaces between the “D” and “G”)
  • URCALL — this is set to “CQCQCQ” unless you are calling a specific station (not just working a random station through a repeater)

Simple enough, right?  Well simple except the Icom software I was using to make programming “easier” prevented me from entering anything into the RPT2 field — that wasn’t critical enough to prevent me from contacting local users of the repeater but it would prevent my digital signals from making it onto the internet and remote users.

The solution was to setup the radio using the Icom software, download it to the IC-80AD, then use the keyboard to enter the correct RPT2 values.  Finally the rig settings were transferred back to the computer and saved.  And in the process of doing all of this I discovered that putting the radio into the DR mode, even accidentally, really messes things up (even though this button seems to be exactly what you want to press — don’t.)

But tenacity payed off, and this one time setup (for the most part) is complete.  I now have fully functional memory channel programming with the proper settings for D-Star DV.  Now I can enjoy the radio rather than fight with it.

Icom IC-80AD

Posted in D-Star, From the OM | 1 Comment

Obtaining a RI “Amateur Radio Operator Plate” from the new DMV

Let me begin by saying that Rhode Island has totally rebuilt their DMV — once the butt of thousands of jokes, and a prime example of government incompetence at its worst, it has morphed into an example that proves government CAN work for the people and can do it efficiently.

So in general I am wildly happy about the new and improved DMV.  Unfortunately, in fixing the old DMV, they lost the magic key for ham radio operators.  Amateur Radio Operator Plates, provided for under Rhode Island General Law 31-3-39, are NOT vanity plates.  Anyone holding a valid FCC issued license can obtain these special plates without the usual fees associated with special or vanity plates.  Unfortunately the normal telephone number leads to an endless loop of menus when trying to talk to someone about Callsign Plates, and use of the Online Application (the only “standard” way), is a mistake as it would lead to annual fees plus it won’t accept a call like “WB4SON” as this is not an allowable vanity tag.

I eventually found a special plate department phone number:  (401) 462-5801

I called that number and left a message, and less than 24 hours later a nice lady called and said that the correct procedure was to visit the main DMV office (600 New London Avenue Cranston, RI 02920), and take the elevator to the “Research Department” located on the 3rd floor.  I was instructed to bring a copy of my license, along with the original, and my current registration, and was assured that they would fill out the required paperwork to obtain my Amateur Radio Operator Plate.

Sounds wonderful and almost too easy.  I will report back.

RI Amateur Radio Operator’s Plate


Posted in From the OM | 1 Comment

KX3 in the CW CQ WPX Contest

Many things test the metal of receiver.  The ability of a receiver to survive a busy contest is certainly a key test.

I had the opportunity to use my KX3 in the CW CQ WPX Contest this weekend.  20 and 15 meters were wall to wall S9 signals 300 Hz apart, and I had no issue working in that environment with the KX3.  I spent the first day running the rig with the stock firmware (0.99) and manually logging and using the rig’s paddle.  By the second day I had attached my laptop and was running the N1MM Contest Logger along with a WinKey USB keyer.

I had also loaded the latest beta firmware version (1.01) with “improved AGC” performance.  That didn’t work out so well, as the rig would frequently go into total AF saturation (clipping/distortion) until the AGC*THR was set to 010, which calmed things down except for 10 meters (I think rapid QSB was causing issues there).  But that’s why Elecraft wanted some tests done — to check things out in the real world.  Reverting back to the older release firmware resolved the issue.

So how did things go?  Fantastic.  If I could hear them, I could work them (if I waited long enough for the pileup of KW signals to give my 5 watts signal a chance).  In the end I had 256 contact covering most of the US, South America, and Europe.  Outside of the audio glitches caused by the test firmware, everything was great, meaning the KX3 would be a perfect small very high performance radio for DXpeditions.

I can remember trying to use my FT817 in the same contest last year with dismal results. The receiver was horribly overloaded and turned into a wall of wailing chirps and beeps.  I think I managed 6 contacts before giving up on QRP.  I then switched to my IC-9100.  That did much better but there were plenty of issues with the AGC pumping on strong signals that were on either side of the signal I was trying to copy (the roofing filter on the IC-9100 is 3KHz — not optimal for CW work at all).

The next big test for the KX3 will be Field Day.  I won’t be operating it on-air, but I will be evaluating the receive performance in the presence of several strong signals a few hundred feet away when I’m between satellite passes.  We shall see, but so far the results are unbelievable for such a small rig.


Posted in From the OM, Gear, QRP | Leave a comment